Butterfly Nail Art: A Complete Guide To Fluttery Designs And Techniques
Have you ever scrolled through social media and paused at a set of nails that look like tiny, delicate butterflies have just landed there? Butterfly nail art has exploded from a niche trend into a mainstream manicure obsession, captivating everyone from teens to sophisticated professionals. But what is it about this particular design that resonates so deeply? It’s more than just a pretty pattern; it’s a wearable symbol of transformation, freedom, and delicate beauty. This guide will take you from admiring those fluttery designs to creating them yourself, exploring every technique, trend, and tip you need to know to master the art of butterfly nails.
The Metamorphosis of a Trend: Why Butterflies?
A Symbol That Soars Beyond Aesthetics
The butterfly is a universal symbol of transformation, rebirth, and graceful change. This profound meaning is a core reason for the design's enduring appeal. People aren't just choosing a cute pattern; they are often selecting a design that mirrors a personal journey, a new chapter, or a desire for lightness and freedom. This emotional connection elevates butterfly nail art from simple decoration to a form of personal storytelling. In a world where self-expression is paramount, your nails become a tiny canvas for your narrative.
From Runways to Instagram Feeds
The trend's momentum is undeniable. High-fashion designers have consistently featured butterfly motifs in their collections, from Alexander McQueen’s iconic prints to more recent interpretations. This high-end validation trickles down to everyday nail art. On platforms like Instagram and TikTok, hashtags like #ButterflyNails and #ButterflyNailArt boast millions of posts, showcasing an incredible range of interpretations. This virality is fueled by the design's versatility—it can be eerie and gothic, sweet and pastel, or starkly modern—ensuring there's a butterfly style for every aesthetic.
Designing Your Wings: A Universe of Butterfly Nail Ideas
Minimalist Butterflies: Less is More
You don't need a full canvas to make an impact. Minimalist butterfly nail art focuses on clean lines and subtlety. Think:
- A single, tiny silhouette in black or metallic on a bare or nude nail.
- A faint watercolor wash in the shape of a butterfly’s wing.
- A negative space design where the butterfly’s outline is created by the absence of polish.
This approach is perfect for the office, for those who prefer a "quiet luxury" look, or as a starting point for beginners. The elegance lies in its simplicity and the skill required to execute a clean, precise shape.
3D and Embellished Butterflies: Drama and Dimension
For those who love texture and drama, 3D butterfly nail art is the ultimate expression. This involves adding physical elements that rise from the nail’s surface.
- Materials: Tiny rhinestones, glitter, dried flowers, or even miniature 3D charms (applied with nail glue).
- Application: These are typically placed on a "bed" of thick top coat or gel to create a raised effect. A popular technique is to create the butterfly’s body with a small bead or chain and its wings with flatback crystals or glitter.
- Considerations: While stunning, 3D art is less durable for daily tasks. It’s ideal for special occasions or as an accent on one or two nails rather than a full set.
Thematic and Seasonal Variations
Butterfly designs can be expertly adapted to any season or theme:
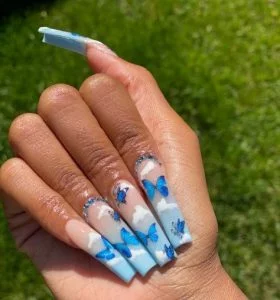
- Spring/Summer: Pastel hues (lavender, mint, peach), floral accents, and glittery wings evoke a garden vibe.
- Fall/Winter: Deeper tones (burgundy, navy, forest green) with matte finishes, or icy silver and white with holographic glitter for a frosty monarch.
- Dark & Edgy: Black base coats with white or silver outlines, blood-red details, or a skeletonized butterfly wing pattern for a gothic, memento mori aesthetic.
- Fantasy & Whimsical: Incorporate stars, moons, or tiny flowers into the wing patterns for an enchanted forest feel.
Mastering the Craft: Essential Techniques for Butterfly Nail Art
The Foundation: Prep and Polish
No design will last without a proper foundation. Nail preparation is non-negotiable.
- Shape & Buff: File nails to your desired shape and lightly buff the surface to remove shine.
- Dehydrate & Clean: Use a lint-free wipe with nail cleanser or alcohol to remove all oils and dust.
- Base Coat: Apply a quality base coat to protect your natural nail and create a sticky surface for color.
- Color Base: Apply 1-2 thin coats of your chosen base color (e.g., nude, pastel, black) and let cure completely if using gel.
Core Application Methods
- Freehand Painting: The classic technique using a nail art brush (typically a detail liner brush). It offers the most control for custom shapes and details but requires a steady hand and practice. Start with the butterfly’s body (a small oval or line), then create symmetrical wing shapes. Add details like wing veins with a thinner brush or a dotting tool.
- Stamping: A game-changer for beginners and experts alike. You use a stamper plate engraved with a butterfly design, scrape off excess polish, pick up the design with the stamper, and transfer it to the nail. This yields perfect, repeatable patterns with minimal effort.
- Stickers & Decals: The quickest route to a flawless design. High-quality nail stickers or water decals come in endless butterfly varieties. Apply carefully with a tweezers and seal with top coat. Look for brands that use flexible, non-peeling materials.
- Sponge Gradient: Create a soft, ombré wing effect. Dab a sponge in two or more polish colors and press it onto the nail where the wings will be, creating a blended transition.
The Toolbox: Must-Have Supplies for Butterfly Nails
To execute professional-looking designs, assemble a basic kit:
- Brushes: A set of nail art brushes (detail liner, striper, dotting tools of various sizes).
- Polishes: A range of colors including a good base coat, top coat, and thin, pigmented color polishes. Gel polishes offer longer wear and a high-gloss finish.
- Stamping Kit: A stamper, scraper, and a few plates with butterfly patterns.
- Adornments: Rhinestones, glitter, metallic strips (striping tape), and tiny charms for 3D effects.
- Cleanup Tools: A small brush dipped in acetone or nail cleanser for tidying up edges.
- Lamp: Essential if working with gel polish.
Longevity & Care: Making Your Butterfly Nails Last
The Top Coat Trilogy
The final seal is what protects your artwork from chips and scratches.
- Quick-Dry Top Coat: For regular polish, a quick-dry top coat prevents smudging.
- Gel Top Coat: If you used gel polish, a cured gel top coat provides the most durable, glossy, and chip-resistant finish.
- Matte Top Coat: For a modern, velvety finish that softens the look of glitter or metallics.
Always apply top coat over the entire nail, including the tip, to lock in the design.
Daily Maintenance Habits
- Wear Gloves: For chores involving water or cleaning chemicals.
- Avoid Picking: Resist the urge to use your nails as tools.
- Reapply Top Coat: Every 2-3 days, a thin layer of top coat can revive shine and add protection.
- Moisturize: Keep cuticles and nails hydrated with cuticle oil to prevent brittleness.
Current Trends & Innovations in Butterfly Nail Art
Metallic & Holographic Finishes
Shimmering, reflective finishes are huge. Holographic butterfly nail art uses polish that shifts color in the light, creating an ethereal, iridescent wing effect. Metallic gold, silver, and chrome powders are also popular for creating a luxe, jewel-like butterfly.
Mixed Media & Texture Combines
The trend is towards mixed media nail art. Imagine a matte black butterfly with a single glossy, glittery wing. Or a butterfly with a velvet sand texture on its body and smooth, shiny wings. Combining textures—matte vs. glossy, smooth vs. glittery—adds depth and high-fashion appeal.
Abstract & Deconstructed Butterflies
Not all butterflies are literal. Many artists are creating abstract butterfly nail art by focusing on the iconic wing shape but interpreting it with color blocks, geometric lines, or marble effects. A "deconstructed" look might feature just the wing tips in a French manicure style or a single wing as an accent nail.
DIY vs. Salon: Which Path is for You?
The DIY Approach
- Pros: Cost-effective, highly personal, therapeutic, and you have complete creative control. Great for experimenting with trends.
- Cons: Time-consuming, requires practice and patience, initial tool investment, and results can be messy without skill.
- Best For: Simple designs (stickers, stamping, minimalist), hobbyists, and anyone who enjoys the creative process.
The Salon Experience
- Pros: Flawless, long-lasting results (especially with gel), access to professional-grade tools and pigments (like chrome powder or intricate 3D elements), and saves you time and frustration.
- Cons: More expensive, requires an appointment, and you’re limited to the artist’s style and the salon’s offerings.
- Best For: Complex 3D art, intricate freehand for a special event, or if you desire a salon-perfect, durable finish without the DIY hassle.
Common Pitfalls and How to Avoid Them
- Smudging: Apply thin layers and let each layer dry/cure fully before adding the next. Use a quick-dry top coat.
- Asymmetry: Use a stencil or stamp for perfect symmetry. For freehand, lightly pencil the design with a thin nail art brush dipped in acetone before applying color.
- Chipping at Tips: Ensure top coat seals the very edge of the nail (the "free edge"). This is the most common failure point.
- Bulkiness with 3D Art: Use the minimal amount of adhesive and top coat to secure embellishments. Too much product leads to a clumsy feel and easy snagging.
- Poor Adhesion: Never skip the base coat, and ensure nails are oil-free before starting.
Conclusion: Your Canvas Awaits
Butterfly nail art is a testament to the power of small-scale artistry. It’s a trend that endures because it marries deep symbolism with boundless creative potential. Whether you opt for a single, subtle silhouette or a full set of dazzling, 3D monarchs, the process is a delightful blend of mindfulness and fashion. Armed with the right tools, techniques, and a touch of patience, you can transform your fingertips into a gallery of fluttery elegance. Remember, every expert was once a beginner. Start with a stamp or a sticker, and don’t be afraid to let your nails tell a story of your own beautiful transformation. The only limit is your imagination.